When using Chrome, you might have come across the term hardware acceleration in the settings for Chrome browser. But what does it mean, and why should you care? Hardware acceleration refers to the process where Chrome utilizes your computer's graphics acceleration capabilities to enhance performance.
By offloading certain tasks to your GPU (Graphics Processing Unit), Chrome can run smoother, especially when dealing with high-definition videos, animations, or graphics-intensive websites. However, it can also cause issues on some systems. That’s why knowing how to enable or disable hardware acceleration in Chrome is crucial. In this guide, we’ll walk you through the steps to turn hardware acceleration on or off, depending on your needs.
What Is Hardware Acceleration?
By default, Chrome relies on your CPU to handle most tasks. However, some activities, such as rendering graphics or processing videos, are better suited for the GPU. This is where hardware acceleration comes into play. It ensures tasks are allocated to the appropriate hardware, improving speed and performance.
For instance:
-
Watching a 4K video or playing online games on Chrome becomes smoother with Chrome hardware acceleration enabled.
-
Loading animations or interactive websites becomes faster.
But why would you want to turn it off? Sometimes, hardware acceleration can cause issues, such as:
-
Chrome freezing or crashing.
-
Problems with specific websites or extensions.
In such cases, disabling the feature might resolve the problem.
How to Turn On or Off Hardware Acceleration in Chrome
Follow these simple steps to enable or disable hardware acceleration in Chrome:
-
Open Chrome Settings: Launch Google Chrome, then click on the three dots in the top-right corner to open the Chrome settings browser.
-
Navigate to Advanced Settings: Scroll down and select “Settings” from the menu. At the bottom of the page, click “Advanced” to reveal more options.
-
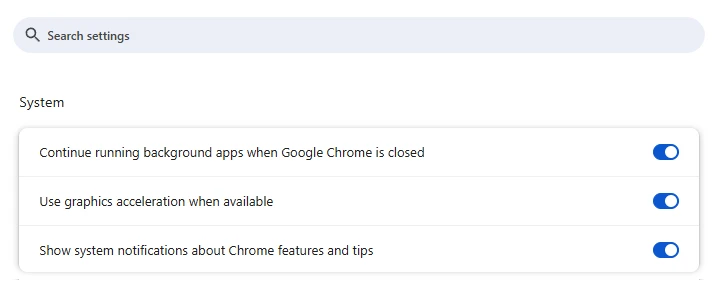
Locate the Hardware Acceleration Option: Under the “System” section, look for the option labeled “Use hardware acceleration when available.”
-
Toggle the Option: To enable hardware acceleration, ensure the toggle is switched to the right (blue). To disable it, toggle it to the left (gray).
-
Restart Chrome: After making your choice, click “Relaunch” to restart Chrome and apply the changes.
Hardware Acceleration on Chromebooks
If you’re using a Chromebook, the process is similar. Open the Chrome settings browser, navigate to the System section, and toggle hardware acceleration on or off. Keep in mind that some Chromebooks may have limited GPU capabilities, so the impact of enabling this feature may vary.
When Should You Disable Hardware Acceleration?
While enabling hardware acceleration can significantly boost Chrome’s performance, there are scenarios where disabling it is the better choice:
-
Frequent Crashes or Freezing: If you notice Chrome frequently crashes after enabling hardware acceleration, your GPU may not be compatible.
-
Display Glitches: Graphics issues such as flickering videos or distorted images can often be resolved by turning off Chrome HW acceleration.
-
Compatibility Issues: Some extensions or older hardware might not work well with this feature.
